[public_html/header.htm]

JLM Go Between, Go Between PLUS Kits, IC DI & NEW Fet DI Kit

  • NEW JLM Go Between PLUS PCB & full PCB parts kit. Parts List
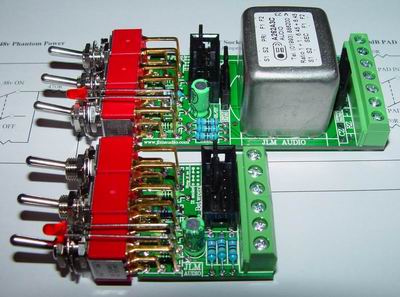
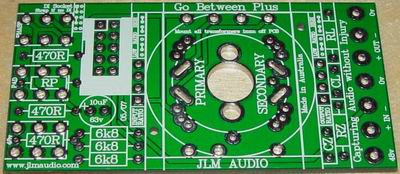
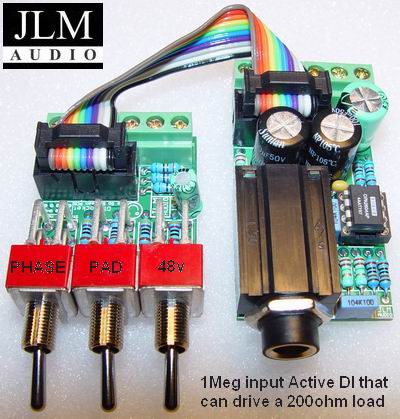
  • This kit provides a quick and easy way to add 48v phantom power, 20dB PAD, Phase reverse & Input transformer to help rack API & Quad8 etc amp cards or add these extra features to mic pres without them. Also has a IDC connected for adding the JLM Active DI kit in seconds. Go between Plus PCB can take all the input transformers that Baby Animal and Dual 99v PCB's can take and has input & output ratio jumpers as well as places for Rload, Cload, Rzobel, Czobel parts on the PCB. Transformer secondary is available on the output terminal as a floating balanced signal which can be strapped to unbalanced as well.
  • JLM Go Between PCB & full PCB parts kit. Parts List  Schematic
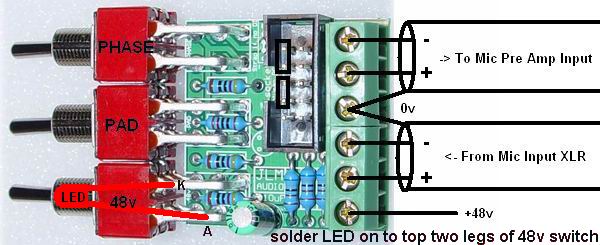
  • This kit provides a quick and easy way to add 48v phantom power, 20dB PAD & Phase reverse to help rack API & Quad8 etc amp cards or add these extra features to mic pres without them. Also has a IDC connected for adding the JLM Active DI kit in seconds.
  • Mounting details :- 3 x 7mm holes in a row spaced at 11.75mm from centre of each switch (PCB 32.5mm x 32.5mm)
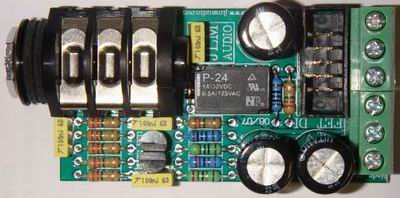
  • NEW JLM FET DI PCB & full PCB parts kit. Parts List
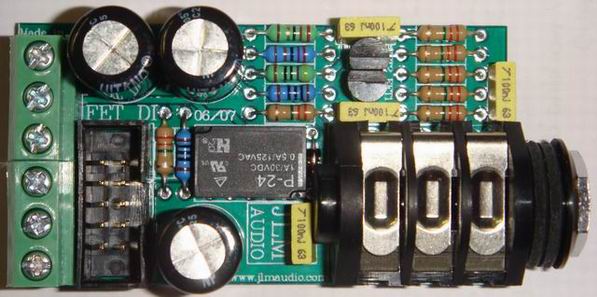
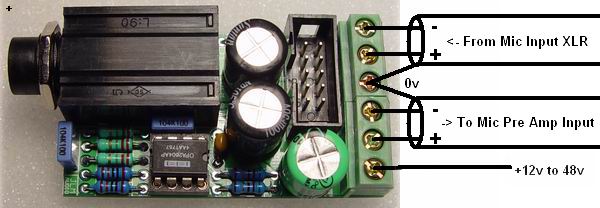
  • The JLM FFET DI Kit just plugs into the GO Between or GO between PLUS or Any Baby Animal type PCB by a 10pin IDC cable which will do all connections and power the DI or you can just cut into the Cable coming from the Mic Input XLR that goes to the input transformer primary on any mic pre and it only needs one +12v to + 48v power rail to run on. It uses the two FETs running as a unity gain impedance converter so it can drive 200ohm loads. It has a 1Meg input impedance on the jack so the loading to the guitar pickup is the same as a Fender or Marshall Amp. Inserting the jack switches the small relay on the DI from the mic input and sends the active DI into the input transformer. New Fet DI uses a Cliff S4 socket which can bolt easy to any 1 to 5mm front panel. The Active DI Kit can be battery or Phantom powered when used externally but needs a output transformer if phantom powered.
  • Mounting Details :- 1 x 12mm hole with centre 8.9mm in from edge of PCB. Maximum height above any component above DI PCB is 20mm (PCB 30.5mm x 56.5mm)
  • OLD JLM DI PCB & full PCB parts kit. Parts List  Schematic 
  • The JLM DI Kit just plugs into the GO Between or GO between PLUS or Any Baby Animal type PCB by a 10pin IDC cable or you can just cut into the Cable coming from the Mic Input XLR that goes to the input transformer primary on any mic pre. It only needs one +12v to + 48v power rail to run on. It uses the two opamps from a OPA2604 in Parallel so it can drive 200ohm loads. It has a 1Meg input impedance on the jack so the loading to the guitar pickup is the same as a Fender or Marshall Amp. Inserting the jack cuts off the mic input and sends the active DI into the input transformer. The Active DI Kit can be battery or Phantom powered when used externally. If using an output transformer you can still use the OPA2604 IC. Schematic Or by changing the IC to a TL072 the DI can be run from phantom power by adding 2 x 6.8k resistors. Schematic (The plastic thread on this socket can only do up to a 3mm front panel if the socket is pushed fully forward and level with the front edge of  PCB when soldered in and will strip if over tightened.)
  • Mounting Details :- 1 x 12mm hole with centre 8.9mm in from edge of PCB.  Maximum height above any component above DI PCB is 20mm (PCB 30.5mm x 56.5mm)
  • Note 1. New PCB's are screened with 2 x 300R for the output resistors to give 150ohm output impedance like most modern microphones.
    The original 51R values gave a 25ohm output impedance which can make some mic input transformers ring causing unwanted high frequencies.
  • Note 2. DI comes standard with IDC cable and conentors
  • When using the JLM Go Between and JLM DI Kit together only the Go Between needs to be wired to its screw terminals.
  • The only wiring needed to the JLM DI is the 10pin IDC cable.

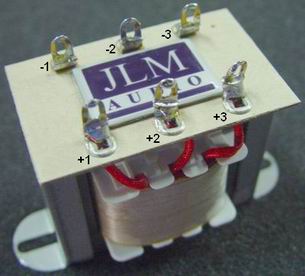
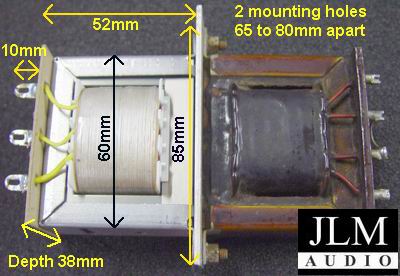
New JLM111DC Output transformer. Can be used for Neve LO1166 or API 2503 type DIY projects. The transformer is DC gapped and has 3 identical 150ohm windings that are trifilar wound. So can use as 1:1:1 or 1:2 or 2:1 applications. It is physically the same size as the LO1166 except the the top terminal plate is narrower so it will fit on its side in 1 unit high racks which have a 38mm internal height. Each winding has its connections opposite each other and one side is marked Red+ and the other Yellow-. 

  • For 1:1 use any winding for primary and any other winding for secondary.
  • For 1:2 you could use winding 1 for primary and wire +2 to -3 and take  +3 & -2 as the secondary.