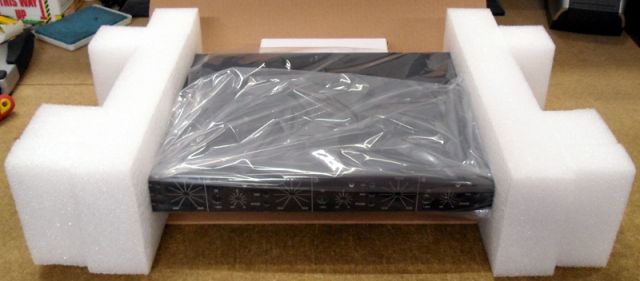
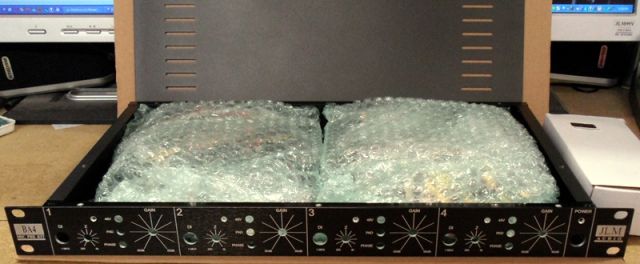
Updated BA4 4 channel mic pre rack kit. Comes with any combo of 4 of our BA or BAN kit with options picked below to build lots great soundingdifferentmic pres.
BA4 kit comes with 48v external power supply and everything down to the wiring and last nut and bolt and full rack case with lasered text and CNC front and back.
You only need to pick the from options list at the bottom of the page to complete the final parts options and this will vary the final BA4 price.
The most popular BA4 configuration is 2 x JLM14 input transformer + JLM99v opamp for big smooth fat and clean sounding 2 x VTX + JLM99v opamp for a bit more coloured in a Neve 1073 kind of way.
Updates
- All 4 channels now have Z variable impedance control.
- All 4 channels can now have Fet DI or blank plug fitted.
- Quicker and easier to build as most of our Baby Animal kits wiring is done with 10wire ribbon cable that are provided made up so no shielded cable and only a few single wire connections are needed.
- No mains wiring or power supply to build as it comes with and runs on our 48v prebuilt SMPS that can run on 85vac to 250vac without switching. (Power supply takes standard IEC power lead so is easy to plug into power anywhere in the world.
- Di kits used now are the new Fet DI kit which is simpler to build and mount to the front panel easily with a strong Cliff S4 jack.
- New rear mounted blue power led and red phantom power leds to make removing mic pre modules easier.
Feature for each channel
- Balanced Neutrik Gold XLR in rear panel which is switched to 1meg Fet DI input when jack plugged in.
- 48v phantom power switch with red LED indicator for rack XLR in.
- (All below features work for XLR and DI input.)
- Phase switch.
- 20dB pad switch.
- Input transformer.
- Variable Impedance 200ohm to 3k with centre detent at starting Z point.
- Gain Control 20dB to 60dB
- Huge output transformer option available.
- Balanced Neutrik gold XLR out on rear panel .
Sound Samples I am not a big fan of samples because if you didn't hear the original instruments sound in the studio with your own ears then really you don't have a true point of reference to gauge the samples against. These samples are more to show the difference between the TG500 and Dual99v500 (same as Daul99v rack kit version built on BAD and similair to BA kit fitted with VTX and 99v except BA runs out of gain at 60dB).
All instruments recorded by Matt Redlich with no EQ or compression. Pres had Impedance left centred in the Z detent and no HPF. Pres were used in there cleanest mode with output trim not pulled to allow for gain overdrive.
Drums - Colin O'Reilly. Acoustic Guitar - Ben Stewart. Electric Guitar - Greg Cathcart.
Drum kit -> Pearl Masters Mahogany Classic 4 piece kit with Zildjian New Beat hats and a Zanki ridewith mostly Remo single ply heads.
- Drum Fill Dual99v500.wma (144KB) (Kick -> Shure Beta 52, Snare -> Beyer M69, OH -> 2 x Calrec CB20c -> 4 x Dual99v500 mic pres -> Cranesong HEDD & OH Audiofire 8)
- Drum Fill TG500.wma (162KB) (Kick -> Shure Beta 52, Snare -> Beyer M69, OH -> 2 x Calrec CB20c -> 4 x TG500 mic pres -> Cranesong HEDD & OH Audiofire 8)
- Rock Drum Dual99v500.wma (529KB) (Kick -> Shure Beta 52, Snare -> Beyer M69, OH -> 2 x Calrec CB20c -> 4 x Dual99v500 mic pres -> Cranesong HEDD)
- Rock Drum TG500.wma (537KB) (Kick -> Shure Beta 52, Snare -> Beyer M69, OH -> 2 x Calrec CB20c -> 4 x TG500 mic pres -> Cranesong HEDD)
- Acoustic Picking Dual99v500.wma (476KB) (Gibson '95 Blues King -> Neumann CMV551 with JLM mod -> Dual99v500 mic pre -> Cranesong HEDD)
- Acoustic Picking TG500.wma (467KB) (Gibson '95 Blues King -> Neumann CMV551 with JLM mod -> TG500 mic pre -> Cranesong HEDD)
- Electric Strumming Dual99v500.wma (782KB) (Gibson Les Paul -> VOX AC15CC1 -> HRM4 Cheap Chinese Large Ribbon Mic -> Dual99v500 mic pre -> Cranesong HEDD)
- Electric Strumming TG500.wma (782KB) (Gibson Les Paul-> VOX AC15CC1 -> HRM4 Cheap Chinese Large Ribbon Mic -> TG500 mic pre -> Cranesong HEDD)
Mic Pre Samples by JLM Audio
BA4 Build thread here
BAN Build thread here
BAN kit comes with 2 x BC550C and 1 x OPA2604AP input opamp but you need to select a output opamp and optional output transformer.
For BAN kit instead of BA kit you need to select input transformer as BAN and then a opamp and output transformer option like a normal BA kit.


